Showing posts with label my updates. Show all posts

Saturday, January 13, 2018

Quilling Workshop - UUCC Women's Retreat

Smiling with my quilling
supplies at hand.
There was a buzz of happy conversation during registration for the Unitarian Universalist Congregation of Columbia's (UUCC) Women's Retreat this January 6th.  We hadn't had a woman's retreat in over a year, and this one-day mini-re"treat" was indeed a treat.

I was excited and honored that my quilling workshop was selected as part of the program!  As I noted in a previous post, at the last women's retreat I quilled my name tag.  This tag started all sorts of conversations, including one that suggested I should teach quilling at the next retreat.  It was really gratifying to see that idea come to fruition.

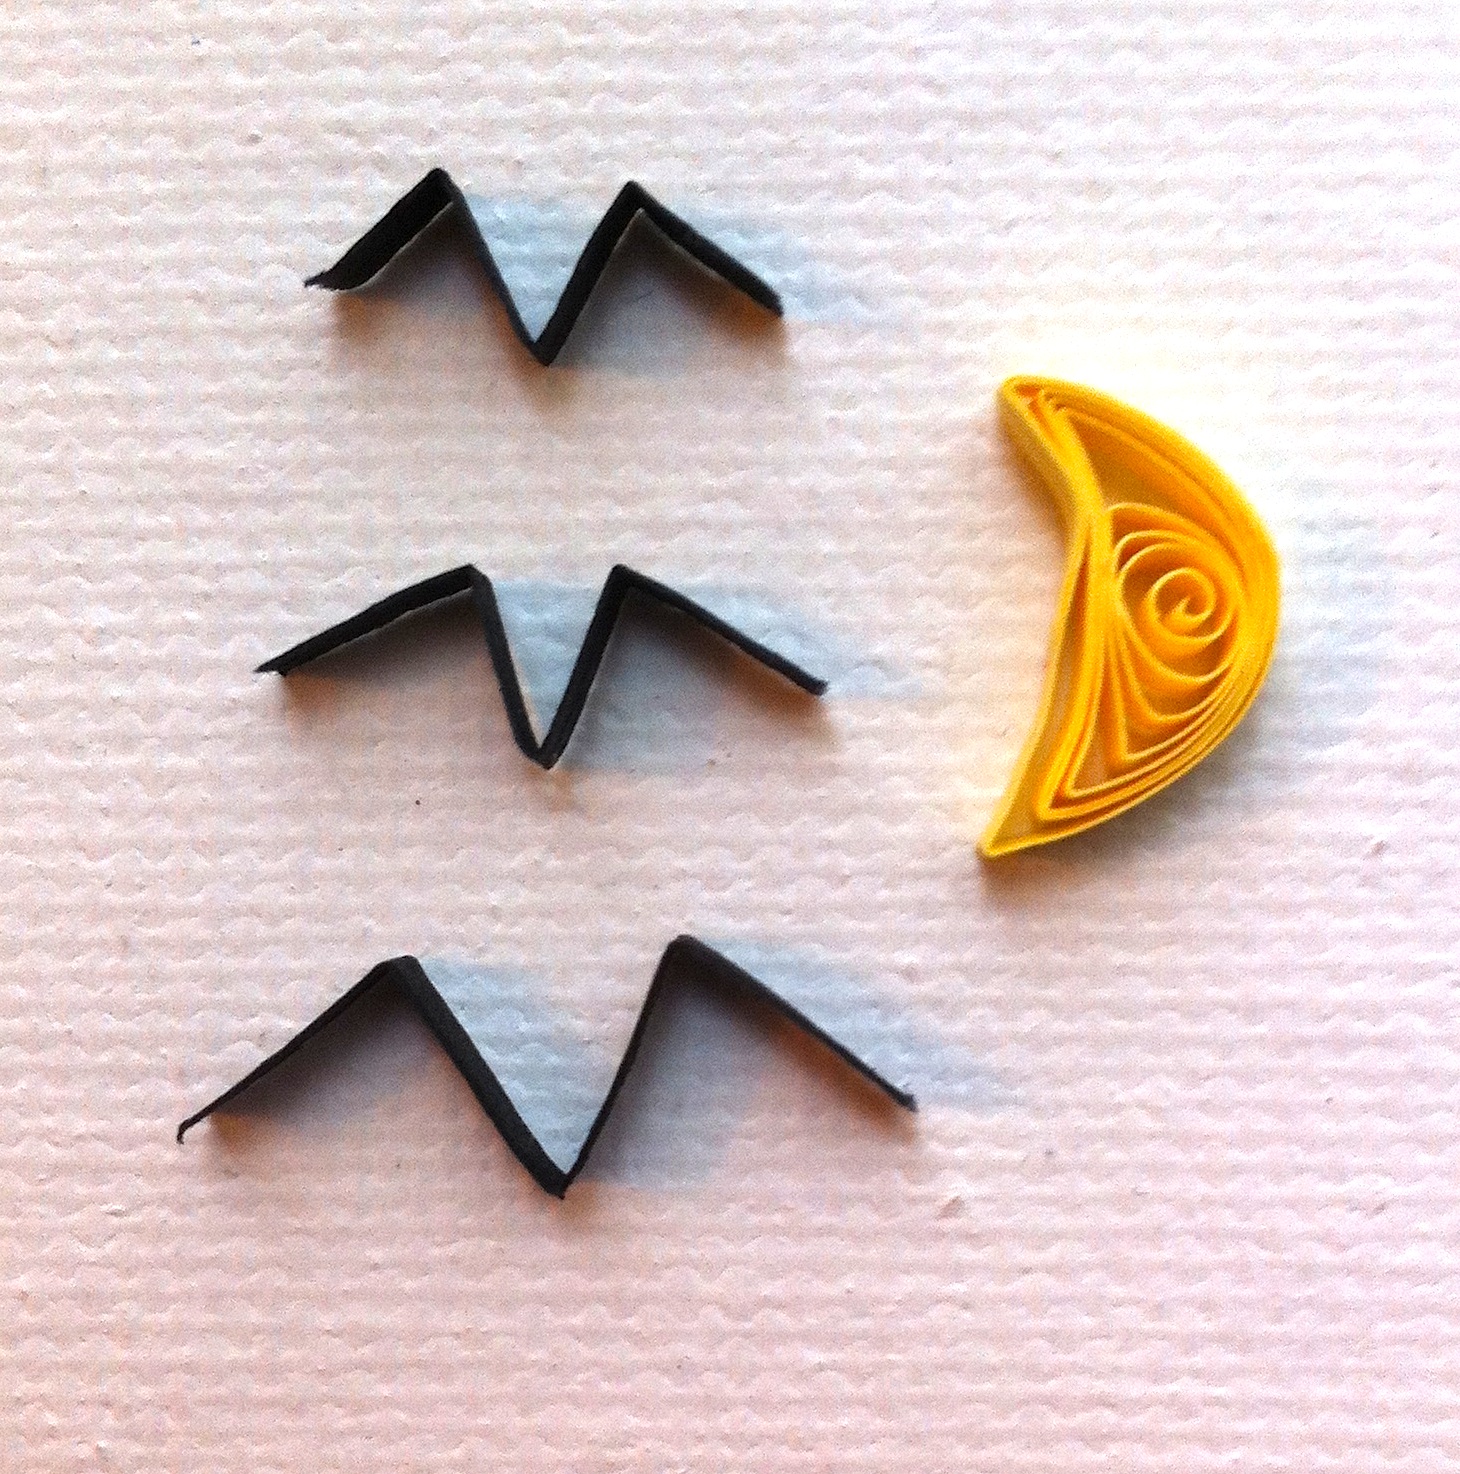
Now, I had taught a quilling workshop just the week before to children aged 5-12.  It went wonderfully, but all my materials were in a happy mess.  I had to scramble to get myself organized for the Jan 6th retreat.  With organization mostly achieved, I packed 15 of my 50 quilling books into my rolling craft carrier, along with tools, paper, patterns, glue and all the rest.  I included some of my actual quilling, like my Halloween Sampler, Spiral Moon, and Berry Sampler.

Discussing quilling designs with artist
Carol Zika.  The books were a great way
to introduce the world of quilling.
Everyone found something to inspire them.
The room filled with the 20 people who had scheduled for the workshop.  I was prepared with a pile of tools and paper (thanks muchly to Quilled Creations and their teacher discount!) so everyone had their own to work with.  We started with introductions, and then I spent time passing around my quilling examples as well as quilling books so everyone would have a chance to see all the amazing things that are possible with nothing more than paper and glue.

Then we got deep into the paper, with everyone practicing how to form the basic loose coil.  As it happens, I don't quill with a tool; I've been using my fingers alone for decades.  I only use a needle tool in some specific circumstances.  Many of my quillers with stiffer hands and arthritis found the slotted tool to be the most user-friendly way to quill.  Some quillers preferred the fingers-only approach. 

I find this is a very important point in a workshop, because an experienced quiller makes things look easy, and for first timers quilling can be tricky.  When their first coils don't look like mine, I always see some frustration.  So I provide a lot of encouragement and coaching at this point, trying to get people to adjust to the fact that their initial attempts might not be as perfect as they had hoped.  Quilling, like any craft, gets easier the more you do it.  The group was having fun, and was very motivated, so collective frustration didn't last long.

Here I am demonstrating my personal
take on the finger quilling technique.
I handed out sheets with various shapes (thanks here to the NAQG formal list of shapes and names) and we made teardrops, squares, triangles, eyes, and more.  By this time some of the quillers were off - seeing things in the books they wanted to try and just going for it.  Others spent more time quilling the basic shapes, trying to hone their technique.

By the end of our time, everyone had at least some quilled shapes to take home, while others had used the cards I provided to make some pretty substantial designs.  I was able to hand out extra paper to everyone, and even some tools to those who wanted to use them.  I also gave everyone a three page handout I had prepared that included: information about quilling, instructions on making the basic shapes, and free snowflake patterns I designed using those shapes.  It also included my contact information.  It was really nice to get two emails the very next day from people who said they had a great time, and wanted to continue to quill!

I had a great time sharing something I have loved since I was nine years old (which means 40 years of quilling, yikes!)  It was also wonderful to have some more time to connect with the women at UUCC.  I'm looking forward to our retreat this fall in early December!

Images:  Pics using my camera taken by workshop attendee.  Carol Zika's face and name appear with her permission.

Sunday, January 7, 2018

Creative Endeavors: A Bit of Bread

After quite the blogging hiatus here, I'm back with lots to share!  Last year was filled with all sorts of unscheduled fun like multiple bouts of the flu and a couple family medical crises (thankfully all resolved in a good way.)  And then there's that textbook that has been taking up all of my spare writing time ... but that's well in hand (finally) and it's time to get back into the blogging habit for 2018.  I've already done two quilling workshops in the last 10 days, and I'm excited to let you in on all that happened!

But first ...

I couldn't resist blogging about this loaf of bread.  I know, it isn't quilling or jewelry, but I consider bread to be a highly creative (and unpredictable) endeavor, so here it is.

I spotted this bread mix in a store.  "Soberdough" which it certainly isn't.  I normally stay well away from making real bread - I can't get it to rise; I think I might be a witch.  But anyway, this one said, "Just Add Beer" and I couldn't resist.  Since it was cinnamon swirl bread I used a bottle of Angry Orchard Cinnful Apple Hard Cider instead of beer.  Mixed it up as directed.  It said "pour" into bread pan but mine sort of "plopped."

Still, it made the house smell great while it was baking.  I pulled it out, let it cool, and lo and behold, a loaf of bread.  It sort of has a consistency somewhere in the middle of the muffin-bread-cake ternary diagram.  Flavor is not bad at all.  Had some for tea today, and it was very nice.

The real test?  Let's see if it makes good french toast tomorrow!

Wednesday, November 16, 2016

What a little quilled name tag can do ...

I spent last weekend at a women's retreat organized by my church.  It ended up being a wonderful time, but I started the weekend not knowing anyone at all.  I was concerned that, what with having social anxiety, I'd be afraid to meet anyone, and would spend the time alone.

Still, I went to the event with an open mind and lots of hope to meet other local women and perhaps start some new friendships.  I noticed on the agenda that one of the first things we were going to do was "Make Your Own Name Tag" so naturally I brought along my travel quilling kit with some extra cardstock.

The name itself had been provided for us, so all I had to do was pick some pretty paper, glue things together, and then do a bit of quilling.  I chose something simple because I was nervous, and because I wanted to be sure the glue had time to dry before I put the tag on.  Flowers, can't go wrong. 

The first thing that happened was that the array of colors of the quilling paper attracted some attention. "What is that?" one woman asked, and of course I was thrilled to give a quick quilling demonstration.  Another woman walked over and said, "Oh, my mom used to do that!  I forget what it's called."  And so a different conversation got started.  By the end of name-tag-making-time, I had several people sitting around me, talking, making tags, and asking to use some of my supplies.  It was great.

The rest of the weekend people kept coming up to me and remarking on my name tag.  It was absolutely the best conversation starter.  I had no idea it would attract so much attention, but was glad that it did - I met so many wonderful people that I probably would have been too shy to approach myself.  At the end weekend one of the organizers said I should consider doing a quilling workshop for the next year's retreat!  I certainly hope I can say yes to that request - I'll have to see what my schedule holds, but it was so nice to be asked.

I will certainly be quilling more things like name tags in the future.  It turns out to be the perfect way to get a conversation going and to meet new people!

Image Credit:  My pic of my own nametag, my quilling and design.

Friday, October 7, 2016

Quilled Moon Won Second Place!

Happy framed full Moon!
Wow!  OMG!  I am thrilled, humbled and honored to have tied for second place in the Little Circles Quilling contest for this year!  The newsletter from Little Circles with the announcement of the winners is here.

My piece "Spiral Moon" (that I've been blogging about here) was selected based on number of likes, originality, creativity, and technique.  There were so many really outstanding pieces in the 64 piece lineup, that I really am surprised to have earned a 2nd place finish.  Thanks to everyone who encouraged me while I was working on this piece, and who liked the picture on Facebook - both gave me the boost I needed to have a winning work of art!

The art will get a bit more exposure, too, because it is going to be exhibited as part of The Art of Planetary Science that will be offered at this year's DPS/EPSC meeting in Pasadena.  So I'll get to see what the science community has to say about it, too  :)

I hope you enjoyed following along as the piece took shape!  I'll blog more about the exploits of 'Spiral Moon' as they occur!

Image Credits:  All my pix of my original art.

Friday, September 16, 2016

Quilling the Moon: Highlands and Maria

Moon - over half completed!
Highlands regions carefully
constructed to be filled in
later with 'mare' material.
As I mentioned in my first "Quilling the Moon" post, the highlands are the bright, mountainous areas of the Moon, while the mare regions (maria, plural) are the dark, flat, volcanic plains of the Moon.  I also mentioned along the way that since the mare were being filled in with nearly black paper, I needed daylight to do that work.  So I ended up working nights on the light highlands and leaving holes behind to be filled up with dark paper during the day.  It was an interesting way to approach the project, since I had to be constantly planning several steps ahead as to how the regions would look once they were completed.

Moon - Maria filled in!
Again, the color choice was really critical, and took a great deal of time.  I wanted to be sure the smaller, bright craters were consistently marked with the bright white paper, and that the intermediate areas were marked with the darker grey, leaving the bone white for the overall highlands material.  Creating the mare boundaries was also a challenge because I needed to ensure that the quills fit together nicely, with the sizes varying in a pleasing random sort of way.

Close-up of filled maria.
Going back and filling in the mare was very gratifying, since it made me feel like I was making a ton of progress.  But this was where the sizes of the quills really made a big difference.  Being constrained by the small areas, I had to be very careful and clever about how each quill fit next to its neighbor.  Some of the quills in this project are made from paper less than 1/4" in length, and so were pretty challenging to make and to fit into the tiny spaces they needed to occupy.  I remember doing work like this is a child, and the 'smallness' of the quills not being nearly so difficult for both fingers and eyes!

Image Credits:  My pix of my own quilling, my design!

Sunday, September 11, 2016

Quilling the Moon: Progress in the South

Some progress!
Even more progress!
As of this moment, I've finally completed my Moon, but I want to post some of the intermediate pictures to show the progress.  So I'll be finishing up the Moon blogging in another post or so.  But for now, compare the two images here and you can see how the edge of the Procellarum basin expanded towards the center of the image, and how the highlands were filled in from the right.

The mare sections at the top and left of Copernicus crater were really challenging.  As I approached the bottom of the Imbrium basin, I got more and more nervous about exactly how the basins would 'express' themselves.  I wanted them to be bold and easily recognized, but didn't want to lose the subtlety of the interesting margins, and of the craters and their ejecta.  So I moved very carefully, filling in the area to ensure that the basin would have an obvious round edge to it, but also ensuring that all the important tiny features could still be seen.

Close up of the area around
Copernicus.
Looking at the close up image makes this all seem so straightforward and easy!  But since every single quill was created on the fly - size, color, and placement - it was really very difficult.  But I do like the general effect.  It is certainly the Moon, and it has a strong mosaic look without losing the lacy feel that quilling offers.

What I'm starting to worry about now is how to hide the errors I'm spotting.  Like how my Moon is not a perfect circle anymore.  Pressure from the different areas as I glued them in place slowly altered the nature of the outline - it isn't quite a perfect circle.  I can see flatter areas, and areas with slight bulges.  Not sure how to hide this - I was already planning to put mat board around the outline, so perhaps this will make the project look more even.

Image Credits - My pix of my own quilling, my design!

Friday, September 2, 2016

Quilling the Moon: The Edge of Procellarum and Some Lessons

The first portion is filled in.
Here's some progress on my quilled Moon!  I filled in the areas of the highlands and the edge of the mare on the south eastern portion of the Moon.  Many lessons were learned during this initial phase of the project, and I'm sure I'll be going back to this section when it is all finished, and thinking, oh yeah, could have done that bit better.  But there is always room for improvement on any project, and if you wait for perfection, you get nothing!

Color choice - very tricky.
One lesson I learned is that I need better quilling lighting.  Working with dark paper in anything less than bright light is a chore.  It is too hard to see if the quills are nicely coiled, and to determine the perfect sizes to fit together in the mare regions.  So the lesson was twofold - buy a lamp, and also, only work on the mare regions during the daytime!  Another lesson, one I knew but had to have reinforced, was use the tiniest amounts of glue possible.  It really shows up in the dark regions, and I had to take out and redo some sections just to eliminate small glue spots I couldn't get rid of with my tweezers. 

I had no idea that only working with four colors could make color choice so difficult.  But it is.  Each and every one of these quills is an agony of choice.  The regions at the edge of bright/dark regions are particularly challenging.  How and at what point does the gradation start?  Some of the margins were easy, since they were very 'digital' - one side bright and the other dark.  But the messy grey regions ... very challenging.  I spent a lot of time making decisions between what met my artistic vision, and what was the most scientifically accurate.

One of the greatest challenges was the quilling around Copernicus crater, the larger bright crater on the right side of this image.  But I'll talk more about that next time!

Image Credits:  My pix of my own quilling!

Saturday, August 27, 2016

Quilling the Moon: Beginning the Design

Deep breath - start quilling.
As noted in my previous post on the topic, I made a few decisions, like size and color choices, about my Moon.  And then started in ... with more thinking ...

Experiment with some circles,
add some rays to craters.
Armed with only four colors, I considered the Moon.  How would the design look?  Too many options.  I tried a few things, big swirls say, which did not work because there just wasn't enough detail.  Teardrop shapes.  Also did not work because there are too many really small circular features I couldn't depict that way.  I considered the fact that I study impact craters as a scientist, and then I made my choice.  Circles.  Tiny circles.  I'd do the whole thing in circles - not all the same size, since that would look too mechanical, and maybe too much like cross stitch or something.  Nope, I'd vary the size but have no circles with paper longer than about 4.5 inches.  And since I roll my paper pretty tight, that's a small circle.  Most of the Moon would be done with paper in the 2 inch length zone.

Tycho and the Southern Highlands
begin to take shape.
Right.  I also decided I wanted a subtle 'ray' effect for those craters that had rays.  After all, Tycho (the big light splash of a crater in the southern part of the Moon) would just not look the same without rays.  So I started out, putting up a few strips on their side to be the outline of the Moon, and the rays.  Then I started with Tycho, filling in just around the ejecta blanket of the crater in bright white, and out a bit into the highlands with the very light ivory and then some of the medium grey.  I liked the look, thank heavens, and so was inspired to keep on going!

Image Credits:  My pictures of my own quilling, my design.

Wednesday, August 24, 2016

Quilling the Moon: Starting Considerations

Beautiful full Moon - must quill.
I've been telling myself for many, many years that I should quill the Moon in some fashion or other.  The Moon is one of my very favorite objects - I am a lunar scientist after all, and have been studying the surface of that world since I started college thirty years ago.  Thirty years is a long time to have a Moon fixation, be a quiller, and not quill the Moon.

My motivation for doing this now is mostly to have a piece to display at an upcoming science conference in October that has a small space art exhibit associated with it.  And in addition, there is a yearly competition over at Little Circles for quilling that I'm planning to enter this into, as well.

So even though I am not quite finished with my herb sampler from earlier in the year, I am plowing into another project anyway.  Well, plowing might be a strong word.  The first things I'm doing are: taking a good look at a lot of data from the Moon, buying a bunch of grey paper, and pondering what the heck to do with it.

One of the big things I'm fighting as I make this Moon thingy is my need for scientific accuracy.  I have to balance this against design and artistic needs.  This isn't a photograph I'm making after all, this is a quilled piece whose purpose is to evoke the Moon in more of an emotional fashion.  But one can't just turn off being a scientist, so that tension is informing the entire piece.

I found a picture of the Moon that I liked from my many NASA interests, and chose to blow it up to about eight inches in diameter.  I wanted to make it small enough that I'd actually complete it before a decade went by, but big enough that I could portray the craters in enough detail for my scientific perfectionism.

Paper strips, 1/4" in shades of grey.
After doing that, I bought a pile of grey paper.  I'd never bought paper from Little Circles before, so I chose to buy all these colors from their Culture Pop quilling paper line.  I'll talk more about using Culture Pop specifically in another post.  The colors, from pitch black to bright white are:  Velvety Darkness, Feathered Fedora, Steel Guitar, Bottlenose Dolphin, Indoor Recess, Fish Scales, and Photographer's Umbrella.  I went with the quarter inch wide paper instead of the normal eighth inch paper because I wanted the Moon to have a more substantial feel to it.  More mosaic-y I guess.  More depth.

My first choice in color was not to make the dark regions of the Moon out of pitch black.  As you can see from the picture of the full Moon, the dark regions, that is the 'mare' (pronounced "mar-ay") are not as black as space.  But I did want a good contrast, so I chose a very dark grey, the Feathered Fedora, as my major mare color. 

For the highlands, the brighter areas of the Moon,  I wanted to make the rayed craters the only thing in bright white.  So that meant choosing another color for the bulk of the bright areas.  I had to pick between the sort of ivory-ish color and the mottled grey color.  In the end, I liked the sort of 'bone' look of the very light ivory (thinking about bones and how these areas have a lot of high calcium rocks), and went with 'Fish Scales.'  I also decided I didn't like the sort of mottled look of the quills made with Indoor Recess, so saved that paper for other projects.  I also chose not to use the Steel Guitar at all, because it has a blue undertone that did not mix well with the Fish Scales, at least in my view.  That left me with just one more color, Bottlenose Dolphin as my intermediate grey to fill in the odd areas that are either darker highlands, brighter mare, or mixed regions with no clear color choice.

Enough for now!

Image Credits:  Moon, NASA.  Strips, my quilling strips from my supplies, my pic.

Tuesday, August 2, 2016

Quilling Conference - NAQG, Day One!

Now that the Summer edition of Quill America is out, the 'embargo' on the NAQG con is off - so I can finally post what I wrote back in May about the conference!  I've mentioned before that I think such an embargo is unnecessary, but alas.  Anyway, I submitted some pictures and text to the Summer 2016 Edition of Quill America, and many were selected to appear!  For that I am grateful and pleased!  Some of those pix could not be presented in color, however.  So now that they are there first, I don't have to worry about scooping myself :)  Here are a few more tidbits that don't appear in Quill America, and some of the images in color.

I've spent the last three days (May 2016) at the North American Quilling Guild's annual Conference, held this year in Nashville, TN.  It's been a whirlwind of quilling, classes, meeting new people, and sharing ideas.  I wasn't sure what to expect before I came, but will definitely be leaving tomorrow having had a very positive experience!

Day One (really Thursday evening as well as Friday) started with registration.  Host Judy (far right in the picture up top) and her associates checked us all in and gave us a bag filled with quilling goodies, as well as fun snacks (like Moon Pies).  I spent time in the 'hospitality room' meeting people and doing a bit of quilling (silver earrings with small crystal centers).  I was really happy to be invited along to dinner with some new friends (Michelle, Tracy, and then Mary), and in spite of spills and more, we had a very good time.

Friday was filled with classes, the morning was the vortex coil class taught by Sandy.  I'd never attempted vortex coils before, but the method shown was easy to follow, and by the end of class I was producing some solid coils.  Everyone extolled the class as both fun and useful.  Then it was on to the quilled roses class.  Roses have always, always been a challenge for me, and so it was really good to get more experience.  We were, for the most part, happily suffering together, trying to get our roses to look like ... roses.  I did manage to produce three that were at least recognizable.

After lunch it was off to the Chinese style quilling class where we learned various techniques to create flowing, airy quilling.  Our project was an elegant betta fish with sea grass and sea flowers in curving shapes.  I hadn't done much of this kind of work before, and but caught on pretty quickly to how to 'pull' the strips to separate the strands.  Everyone was focused on our projects and wished we had just a bit more time to get them finished.  Then on to the Quilling A-to-Z class with Kay.  Kay helped us with a variety of questions from accreditation to how to do alternate side looping.  She showed us her own accreditation pieces, along with samples used for teaching students of all ages how to quill.

After dinner with new friends, it was off to bed to try to get ready for the big second, and for me, last day of the conference!

Tuesday, May 17, 2016

Quilling an Iris and Modifying Kits

My little 5x7 framed iris.
This post was supposed to be about my fun time at the NAQG quilling conference - but it turns out the guild embargoes all material relating to the conference until their next newsletter comes out (after June).  I think that this policy is not good for the guild.  My reason is that I think it is important to get new, young quillers into the guild - and having a strong, timely web presence is essential for that.  It means getting updates about events out immediately, and having them on several platforms (along with nice pictures and interesting text).  But I'm not in a position to make those decisions.  Sooooo instead we get an update post about an iris!  I'll post about my time at the conference later.

The original kit design,
note buds.
My husband's favorite flower is the iris.  I've been telling myself I'd quill him a little something for quite a while, and of course an iris came to mind.  But without a lot of extra time for quilling right now, I had to quill something small and straightforward.  I happened to have a kit to quill an iris on a card, and so modified that kit to fit my little frame.  I also changed some of the leaves and buds to fit my own idea of what an iris bud looks like (the one on the card is rather stylized).  I like the final product - a little framed picture he can take into the office.

So my question for you is this - do you use quilling kits?  Perhaps in a teaching setting, or for gifts?  Do you usually follow the directions along exactly or make your own modifications?

Image credits:  Top, my own picture of my own quilling, bottom, Quilled Creations Iris Flower card kit.

Sunday, May 8, 2016

Preparing for a Quilling Conference

I'm soon off to attend my first quilling conference!  This is the North American Quilling Guild's 2016 Con, this year in Nashville, TN.  I thought I wasn't going to be able to attend, but as it is, I'm on work travel not too far away just before the conference.  So I have the opportunity to pop on over and spend the weekend steeped in quilling.  I really hope it's as fun as it sounds, and that I get to spend time meeting new people who enjoy quilling as much as I do!

Still, it was difficult for me to figure out what I had to do to prepare for this conference, and even now I think I might not really be ready.  Not everything one needs to know as a first timer is in one place.  So many people are repeat attendees they probably assume everyone knows how long the con is, when you can register, if there are group events, if there are public events or demos, etc.  Now that the agenda is out, that information is all available, but I didn't know a lot of it when I was making my travel plans many months ago.

I realized rather late in the game that I needed to make my own thematic name tag.  I eventually managed to find a bit of time this afternoon to put one together, a little banjo with some musical notes.  It's pretty basic, but it will do.  The next time I can go to this conference I hope to be able to spend more time on the name tag.  It is a fun idea, and will make a nice keepsake. 

I registered for the contest, but was unable to complete the piece I'd hoped to bring.  So I'm bringing another one.  My fault entirely, I have no idea if I can change pieces at this late date.  But I'll bring a project and see.  Annnnnd then I realized I did not have new business cards for the blog, here!  My cards still have the old blog name.  So I quickly mocked up some cards and printed them at home on card stock.  Not as nice and spiffy as they could be, but hopefully they will serve the purpose.

I didn't even know I had to sign up for classes until it was almost too late to do so.  I blithely assumed I'd just show up and go to whatever classes floated my boat.  But it makes a lot of sense to assign people a priori.  That way there is a good balance, no one instructor is left alone or overwhelmed, and people can plan for how much and what materials to bring with them.  Oh yeah, the materials.  That's another interesting situation for me, since I never check bags when I fly.  But I'm going to have to check for this flight, what with all the quilling tools, scissors, pliers, and other odd devices I'm bringing with me.  Technically, they are all small enough to get through security, but I don't feel like trying to deal with that if someone is weirded out by my odd little paper craft.

Another last minute item that worked in my favor was that they were still looking for volunteers for Saturday afternoon to do demos and take-aways with the general public.  I love stuff like that, and am looking forward showing a few folks how great quilling is, and maybe making someone a quiller-for-life!

Image credit:  All my own stuff, and all my own pictures of that stuff.

Saturday, March 12, 2016

Herb Sampler, Selling Your Work, and More

Lovage - My favorite herb in the kit so far!
So as I mentioned in my first Herb Sampler post, I've finally gotten down to doing serious work on this project I've been meaning to get done for more than two decades.  It's a pretty good kit, this Herb Sampler, similar to the Berry Sampler in many ways.  But there are a few differences that make the Berry Sampler superior, I think. 

First of all, the berries are more three dimensional.  The leaves and such in the berry kit are more tilted, giving the whole piece more of a living feeling.  And the second issue is that this is the first time I have run out of green paper in a kit!  I'm very surprised.  I've never had this happen before, and certainly not with the old Quill Art kits.  Fortunately I had one of those old kits around to raid, and found enough similar paper to continue.  It isn't perfect.  The color is just a smidge off, and the width isn't quite as narrow by half a millimeter, but given one thing and another, I think it will suffice.  I'm pretty picky.  I think all quillers are detail oriented by nature, so good enough is probably, well, good enough.

Kit is coming along - just three more to go - assuming
I now have enough paper ...
I was about half way through the herb kit when a friend visited and saw my completed berry sampler up on the wall in the kitchen.  She liked it, but it was when I showed her my still-in-progress herb sampler that her eyes really lit up.  She asked me to make her one, and said she'd pay for it.  I was (an am) a bit baffled as how to handle it.  I'm more than happy to make her one, although it may be a while before I manage to get through another entire sampler after 23 years of waiting :)  But more, it is the idea of selling this kind of work.  It is impossible to actually get the work value out of quilling, assuming you pay yourself an hourly rate that reflects your expertise at the craft.  Even say $20 an hour, which seems very low for such work, means I'd be charging hundreds of dollars for this piece.  I'm not going to ask a friend to pay that.  So what is the answer?  Ask for less?  Ask for nothing and give it away?  That last is certainly how I've dealt with this issue in the past.  It has always seemed strange to get paid for quilling.  How do you deal with this issue?

Form with filled quills for petals.
So I've placed a picture of the "Lovage" herb front and center on this post.  The Lovage is my favorite so far.  I really love the way the flowers look, with the graceful curls all the same size.  I did not use a mold or form to make these.  I simply eyeball the size, and get very consistent results.  I rarely use the forms and molds, since I find them sort of distracting.  Still, I did use them recently to create my "Pantone" flower, ensuring all the petals would have the same size, in spite of the different weights of the paper.  How about you, do you use forms, and when?

Image Credits:  My pictures of my own stuff, and my own work.  Herb Sampler kit is 1993 Malinda Johnston.

Sunday, January 24, 2016

Herb Sampler after Twenty Three Years

First pattern of twelve - Lemon Balm
As the title notes, I've had my kit for Malinda Johnston's "Herb Sampler" since the darn thing came out - 1993 I think.  Since that time I've fully intended to start (and then complete) the kit.  I've already done the Berry Sampler (completed in 1994).  I want to get the Herb Sampler framed in the same way, and hang them together in the kitchen.  Right now the Berry Sampler is quite lonely in there (and has been for twenty two years ...)

So this is the current '"Work in Progress" WIP as far as quilling goes.  I cracked open the kit and started work.  First of all it is interesting to feel the difference in papers between now and then.  Modern papers, at least in my experience, have a pretty consistent feel regardless of color.  But back then, papers seemed to vary pretty widely in texture depending on the color.  I don't know if that was an actual difference in the paper itself used for each color, or if the dye process changed the texture.  But it is pretty obvious when you run your fingertips over the strands of paper.

My framed Berry Sampler
The second thing ... It's been a long while since I've worked exclusively with very narrow width paper.  This stuff is a shade more narrow than 1/16".  Quite narrow.  And my fingers and hands are rather a bit more stiff than they used to be.  I used to love narrow paper for the lightweight, lacy effect.  I worked with it as much as standard 1/8" paper when I was a kid.  Well the years have made quite a difference, there.

Lastly, I'll mention it's fun to work from a kit again.  My last project was of my own design, and so each and every piece was unique, won't be repeated.  All my color and paper length decisions were made as I went along, along with part of the design.  It made the quilling very slow going, trying experiments (that often didn't work the first time through) and new techniques.  It was fun, yes, but sometimes frustrating.  A kit might be boring for some, given you just follow the lines, but it is a welcome break from the detailed process of design.  At least for the moment. 

I'll post some more updates as I go!

Image Credit - My pic of my own work, pattern Melinda Johnston 1993.


Saturday, January 23, 2016

Making Jewelry - A New Phase

Beads!  Feldspar, Aquamarine, Jasper and Lapis Lazuli.
I decided to start tackling a very hard and emotional job today.  It seems a good thing to do while snowed in from Snowzilla / Snowmageddon.  The job is to start going through all the inventory from my on-hiatus jewelry business, and deciding what to do with it.

Although "on hiatus" is not really accurate ... the business, as a business, is closed.

I started making jewelry as a hobby, and like so many, my hopes expanded to selling the best pieces online and at craft fairs.  More than anything I wanted to *share* what I had created.  But making quality jewelry is expensive, and the best way to make sure I had enough money to buy supplies was to see if I could sell some of my pieces and turn enough of a profit to make more jewelry.  I was encouraged by supportive family members to try a business. 

One of the sets I made with sterling
silver, Swarovski crystal, pearl,
blue chalcedony, and jasper.
And for a few years, it worked, if only just.  It was always a small business, barely scraping by, but it allowed me to create some lovely things, and I hope, make their owners very happy.  But, things have changed.  This was originally a two-person business, and my partner has moved on to other callings and endeavors.  The business was never really set up to be something just one person could handle.  So I'm going to take the business, such as it is, into its next "phase."  I'd rather say that then to imagine my beloved business completely coming to an end.  But pretty soon I'm going to have to face facts.  The business license has not been renewed, and I doubt the Etsy store will ever have cause to reopen. 

I am not up to the stress of dealing with all the paperwork, shipping, craft shows, and such, alone, as well as dealing with all the aspects of supply / design / create.  So I need to dramatically pare down the inventory and obligations into something I can manage on my own.  I still hope to create jewelry for friends, gifts, and maybe a bit of custom work.  But it won't be a business anymore - instead, it is going back to being a hobby.

A mug with the store
logo - Lunar Blue Designs.
So, back to the sorting through stuff.  My partner sent me all of her supplies - boxes and boxes of stuff - including loose beads, earring holders, display table linens, findings, cords, and so much more.  I need to decide what to do with it all.  All of my inventory, and all of hers, needs to be sorted through, and I need to decide what I'm still going to use for occasional jewelry making, what I'm going to sell off, and what I'm going to have to give away.  Then I have to go through packing it all up, getting auctions listed for all the lots, and then shipping it all off.

Many people have had to do this, of course.  Still, I'm very sad about it.  Seeing part of your past come to a close, something that was a creative endeavor close to your heart, is tough.  But I'm trying to be as positive as I can.  I will still be making jewelry when I can find a bit of time to do so.  And years of working in a business has really 'upped my game.'  My pieces are professionally made and of the highest quality.  I am proud of my work.

It has also opened some doors to combine my hobbies of quilling and jewelry into gemstone and paper creations.  I hope to explore more "quilled jewelry" designs and possibilities as time goes on.

And if you are a beaded gemstone jeweler too, you might make out with quite a deal!  After I get through the inventory I'll be posting a number of large lots for sale on Ebay.  So if you are looking for beads at basement prices, it will be something really worth checking out!

Well, back to the piles o stuff!  They ain't gonna sort themselves ... to bad about that :)

Image Credits:  All my pix of all my stuffs

Saturday, September 26, 2015

Poinsettia Flower Ornament Revisited

As you know I posted the directions for my Poinsettia Flower Ornament here on the blog a few weeks ago.  (I had also created directions for my Halloween Sampler, and posted that up at Craftsy for a fee.)  It occurred to me that the directions for the simple poinsettia flower might be a nice thing to post for free, so that's what I did.

I am astonished to say that the Poinsettia Flower Instructions have been downloaded from Craftsy more than a hundred times already!  This means a couple of things to me - people really like free patterns (of course) but also, that there is a demand for really simple quilling patterns.  I am surprised, actually, but it has been ages since I was a beginner at quilling.  I'm having a little trouble imagining what it is like ... especially since there was no internet nor computers when I first started.  I learned all my material from books or from patterns I purchased.

These days, of course people are turning to the internet before anything else.  Why buy a potentially expensive book when you can download patterns for free, and get all your instructions on free videos from various sites?  Seems like a smart way to start and see if you like a craft before making more of an investment in time and money.

So I'll be thinking of ways to post other, small, free patterns and hope they are as useful and popular as the poinsettia!  I wish I had written down the directions for my candy cane when I made it.  I'll have to be more thorough when I make new pieces - someone else might want to make them, too!

Thursday, September 17, 2015

Halloween Sampler - First Projects

As promised, I'm going to post the instructions for my Quilled Halloween Sampler here on the blog.  This is the third post; time to get into the projects!

First post -  Halloween Sampler
Second post - General Instructions and Mat board

And remember, if you want to download all the instructions right now in one go, then head over to Craftsy where I have them posted for $3.99.


BONUS Project:  Quilled Candy in Wrappers

Materials:
- white, 6 strips at 4” long (wrapper)
- white, 3 strips at 8” long (candy)
- bright yellow, 1 strip at 8” long (candy)
- light red, 1 strip at 8” long (candy)
- purple, 1 strip at 8” long (candy)
- orange, 1 strip at 8” long (candy)
- black, 1 strip at 8” long (candy)


Here is an easy project to start off that’s not shown in the sampler – quilled candy in ‘wrappers.’  Start by stacking (right on top of each other, NOT end to end) the red, yellow, and white strips all at once.  The white strip should be on the ‘bottom.”  Roll the three strips up all at the same time.  The three colors swirl together as you roll them.  Make sure the white ends up on the ‘outside.’  Form a circle (the colored strips might need to be trimmed to hide them under the white.) 

Make two triangles with 4" of white paper each.  Curve one side.  Glue these with the curved side out, to either end of the circle.  Repeat with a stack of green/purple/white, and then a stack of orange/black/white.

Project #1:  Flying Bat

Materials:
- black, 8 strips at 6” long (wings)
- black, 1 strip at 9” long (body)
- black, 2 strips at 2” long (ears)
- black, 3 strips – from ¾” long to 1.5” long (small bats)
- bright yellow, 1 strip at 10” long (moon)

First make eight circles with the 6" black strips.  Form these into triangles, but curve one side of each.  Glue these together as shown to form two wings. (Each wing has three triangles pointed ‘up’ and one pointed ‘down’.) 

For the body, take a 9" black strip and make a teardrop.  Take 2" black strips and form them into long triangles for the ears of the bat.  Glue the pieces together. 
Take three black strips that are from 3/4" to 1.5" and make "M" shapes (other bats).  Use a 10" strip of bright yellow in the form of a crescent to serve as the Moon.

Glue these pieces into the mat board – right side middle square.

Image Credit - My pix of my quilling, my designs

Thursday, September 10, 2015

Quilled Halloween Sampler

I've been considering making a sampler of quilled Halloween projects for a long time.  I love Halloween, and often use small designs and motifs on place cards, tags, ornaments, wall art, and more.  I've never bothered to actually write down any of my designs before - so they come out differently every year, AND I have to spend extra time and paper trying to figure out what I did the last time around :)

So this year I spent the time and effort to record all my paper widths, lengths, and shapes as I worked.  I also took a few pictures of the intermediate stages as I went along.  I realized when I was close to finished that I might not be the only person who would like to use the directions.  So to make up some of the resources I used, and to cover some of the time (it took a loooong time to write this up), I decided to post all the instructions for a fee over at Craftsy.  So if you are in immediate need of some ideas for Halloween, look no further!  You can download all 16 pages of Halloween packed PDF for $3.99.

OR if you can wait, and don't have the extra $$, then keep your eyes here on the blog.  I'm going to post all the instructions in pieces right here between now and Halloween!

Here's the blurb from over at Craftsy:

The Quilled Halloween Sampler Instructions will tell you how to make nine different small Halloween themed projects (plus a bonus project!). The 16 pages are packed with pictures and ample details of paper quilling for you to recreate the sampler, or use it to come up with your own scary ideas!

These spooky designs can be used together to form a framed Halloween sampler group, or they can be used separately on greeting cards, gift tags, place settings, ornaments, wall art, or in whatever way suits your fancy! You can be creative and detour from the exact directions whenever it suits you and your project needs.

Some of the projects are very quick, while others are a little more involved, so you can fit the projects to the time you have available. Most of the designs are suitable for someone who knows the basics of paper quilling (beginner), while a few others are suitable for an intermediate level of quiller.

Most of the designs and motifs will be familiar, like bats and pumpkins, while others will be more unusual, like vampire fangs and skeleton keys. Let your creepy side out and enjoy some Halloween fun with the Quilled Halloween Sampler!

Saturday, September 5, 2015

Quilled Holiday Ornaments for the Charity Project

In the end I quilled three ornaments for the "Quilled Ornament Charity Project" (even though when I made the poinsettia, I said I'd only make two).  I knew from the beginning that I didn't want to make snowflakes, since I am assuming Carie is going to get sent a ton of snowflakes.  So I concentrated on other designs that I thought would look good in a green tree.

The candy cane idea came to me as I was considering how I could use white paper for something other than snow.  I made the entire candy cane out of white, and then for the stripes, I just wound one long red strip around the piece and glued the ends down.  To add some interest, I embellished with a sprig of holly.  The star is made only from triangles, circles and eye shapes in white and yellow.  Hopefully it doesn't look too much like a snowflake :)  I didn't want to make it solid yellow, though, since I thought that would been a little boring to look at ...

So off they go to their new home, to be placed on a tree and auctioned off for charity.  Remember that the deadline for ornaments is October 15!  There is still plenty of time to quill a piece or two and send it off.  Shipping is cheap because they hardly weigh anything at all :)

Image Credit:  My pic of my own ornaments.  Designed by me.

Wednesday, September 2, 2015

Work in Progress - Dragon, Update Three, Final!

My dragon is finished (as of August 27th)!  I was able to get him matted and framed under glass.  It took a decent shadow-box style frame, (10"x10" with an inch of clearance) since the dragon is about 3/4" of an inch thick.

Dragon has been entered in a CONTEST!  Please VOTE for him!  He is project #14 on facebook at Little Circles at https://www.facebook.com/LittleCirclesEverywhere  All you need to do to vote is to 'like' the dragon.  Voting only goes on for a few days, September 2-4, 2015 so please skip on over there soon!  Check out the competition, it's pretty fierce.  Some beautiful pieces of quilling!  If dragon gets enough votes to get into the top ten, he goes on to the next round of judging!

Gorgeous dragon face!
So, since the last update, I finished up the three missing legs, and then started on what I knew was going to be the hardest part - the face.  I spent a lot of time planning out exactly how I was going to make each quill for the eyes, nose, teeth, and then the embellishments like the crown of 'fire' and the whiskers.

It was in the face and crown that I strayed the furthest from my colored line art.  The crown is formed from layered curls instead of wisps of colored paper.  I liked this look better - it was lacy and seemed more substantial than what the line art might have called for.  Also the eye and the area around it should have had some blue and green, but I chose to keep the color scheme consistent with orange, so it would grade nicely into the 'fire.'

Side shot of dragon, showing his dimensional nature
The body, face, and tail are all on different levels
and so dragon is almost 3/4 of an inch thick.
I made about two dozen teeth trying to get the exact shapes and sizes that I wanted to fit nicely into the mouth.  The whiskers took an hour on their own, as I searched for just the perfect shade color, and experimented with different techniques for the shapes.  I made several eyes of different shapes, as well.  Some made my dragon look like he'd had too much coffee!  The final choice has him looking forward, and he seems much less startled :)

Then, with all the pieces in hand, I finished them up with spray and proceeded to glue them together.  This step also took a long time, since this dragon is very dimensional.  It is assembled in four different levels.  I had to place pegs onto the back of some of the levels to support them, with a few pegs doubled up to give them enough height.  Then I glued the lower half of the body to the top, and he was finished!

And now he is to be shipped off to his forever home!  It is always bitter-sweet to say goodbye to a project, since I get so attached to them.  But as usual, when I have in mind to give a project away, it never feels right until that person has received the gift.  Then ... well ... next project!

Image Credit:  My pix of my dragon!