Showing posts with label snowflakes. Show all posts

Sunday, January 21, 2018

Basic Snowflakes - Patterns for Beginners

Snowflake #2 - Only four different kinds
of shapes are needed to create this
colorful snowflake - detailed pattern for
this flake to be posted soon on Craftsy.
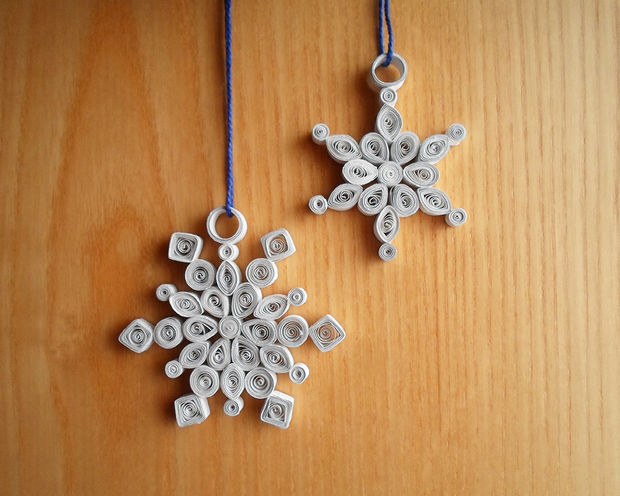
As I mentioned in previous posts, I've taught some workshops recently for beginning quillers.  To support those workshops, I created a couple of patterns for easy snowflakes using just basic shapes.  I'm going to generate some nice write-ups for these and post them for free on Craftsy.  I'll let you know when I do that.  But in the meantime, what with all this snow so far this winter, I thought I'd put the general writeup for the first and easiest snowflake pattern right here.

Snowflake #1 - You will need:
  • Paper Strips – 12 strips of paper, each 8 inches long.
  • White craft glue.
  • Wax paper is good to have, but not necessary.
  • A toothpick can help apply tiny dabs of glue.
  • A quilling tool or toothpick if that’s how you like to roll up your paper quills.

Step One: Get Ready

Work on a flat surface where you can leave your quilling overnight to dry.  If you have it, put a piece of wax paper over the pattern (Snowflake #1 - Pattern, below).  As you make your quills, you can arrange them right over the pattern.  Put your paper strips and glue nearby.

Loose coil shape.  Diamond shape.  Teardrop shape.
Step Two: Make Quills 

Snowflake #1 pattern requires:

- Six (6) Diamond Shapes, any color you like.
- Six (6) Teardrop Shapes, any color you like.

To begin, check out the paper quilling tutorial on Craftsy to learn how to start quilling.  It shows the initial steps, and then how to make basic shapes.  You will want to start by making a loose coil shape, and then pinching it to create one of the two other shapes shown here.  Practice making these shapes until you like what you see.  Then to create Snowflake #1, make six diamond shapes and six teardrop shapes.

Snowflake #1 - Pattern
Your shapes may be bigger or smaller than those in this pattern, depending on if you quill with your fingers or a quilling tool, and how big you let your quills expand before you glue them.  It’s okay if your quills are a different size, just use the pattern as a guide.

Step Three: Arrange and Glue Quills:

Following the pattern, take the six diamond shapes and glue them together to form what looks like a six pointed star.  Give this a few minutes to dry.   Then take the six teardrop shapes and glue them to the star with the points facing outwards.

Step Four: Finish

Let the snowflake dry overnight. Remove it carefully from the background, since if you used a bit too much glue, it may stick.  Then use some string or ribbon to hang!

Image Credits: Snowflakes, my pix of my own snowflakes. Close-up of loos coil, diamond, and teardrop shapes used from http://www.naqg.org/accreditation/NAQGshapeChartFinal2010.pdf

Saturday, August 8, 2015

Help with the Quilled Ornament Charity Project!

Carie Metcalf of Washington state is working on a quilling project for charity, and needs a bit of help from all the quillers she can reach.  She is creating a decorated Christmas tree for her local "Festival of Trees" with the theme "Quilling Around the World."  She needs 250 quilled ornaments of any kind, from everywhere, to put on the tree by October 15, 2015.  After the six-foot-tall tree is fully decorated, it will be auctioned off to support a hospital charity.

She particularly needs help from international quillers, but will gratefully accept a quilled ornament from anywhere.  For details on what she needs, and where and how to prepare and mail your quilling, email Carie at Carecat26 (at) gmail.com.  If you are a member of the North American Quilling Guild, you can also find details inside the Spring 2015 issue.

If you'd like to help out, but have never quilled before, you can check out this tutorial at Instructables.com, which shows how to make a simple quilled snowflake.  It even includes how to cut up a sheet of paper if you don't have access to special quilling paper!  Give it a try, and you may find you really love to quill, just like the rest of us :)  I'm also going to post the instructions for my own quilled Poinsettia Ornament that I will be sending to Carie, so keep your eyes open for that.

Image Credit:  Quilling Snowflake Decorations at Instructables.com