Showing posts with label sampler. Show all posts

Monday, October 31, 2016

Halloween Sampler - Projects #8 and #9

This is the last post for the Halloween Sampler!  Finally ... I hope these instructions are of some use, and that you have fun making a few of these little projects, or the whole sampler!

I particularly hope you have fun with the projects that are a little more unusual - there are lots of patterns for pumpkins, but vampire fangs and skeleton keys are a little more hard to find.

This post covers projects #8 and #9 (out of nine).  I've already posted the general instructions, the mat board cutting instructions, as well as projects #1 - #7 and a bonus project!

First post -  Halloween Sampler
Second post - General Instructions and Mat board
Third post - Bonus Project and Project #1
Fourth post - Projects #2 and #3
Fifth post - Projects #4 and #5 
Sixth post - Projects #6 and #7 
Seventh (and last) post is this one! - Projects #8 and #9

And remember, if you want to download all the instructions right now in one go, then head over to Craftsy where I have them posted for $3.99.

Project #8:  Vampire Fangs

Materials:
Mouth
- bright red, 2 strips at 8” (upper lip)
- bright red, 1 strip at 12” (lower lip)
- bright white, 2 strips at 3” (fangs)
- dark red, 1 strip at 6” (blood drop)
Thorny Rose Vines
- bright red, 1 strip at 12” (rose) 1/4” wide strip
- olive green, 2 strips at 5” (vines)
- olive green, 4 strips at 2.5” (thorns)
- dark red, 1 strip at 3” (blood drop)

Start by using 2 of the 8" bright red strips.  Make two long teardrops.  Make a long, flat semi-circle with the 12" strip.  Glue these three pieces together as shown to form lips.  Form fangs by taking the 2, 3” strips of white and making long triangles.  Glue these on top of the lower lip.  Make a teardrop out of the 6” dark red strip, and glue it to the lower lip so it appears to be dripping off of one of the fangs.

Make a rose from the 12” strip of 1/4" wide paper.  Make two long “S” coil shapes from the 5” olive green strips.  On each of these “S” shapes, glue two thorns.  The thorns are long triangle shapes made from the 2.5” long strips of olive green.  For a final touch, create a small teardrop shape from the 3” dark red strip and position it so it drips from one of the thorns.

The fangs and thorny vines are found in the upper right square of the sampler.  Glue the pieces into place there, the square in the top, right column.

Project #9:  Witch’s Lair

Materials:
Hat
- bright purple, 2 strips at 10” (hat)
- orange, 1 strip at 1.5” (sash)
- yellow, 1 strip at 1” (buckle) ¼ wide paper
- black, 1 strip at 1/8” (buckle)
Cat
- black, 1 strip at 9” (body)
- black, 1 strip at 5” (head)
- black, 1 strip at 4” (tail)
- black, 1 strip at 2” (whiskers)
- black, 1 strip at 2” (nose) 1/8” narrow paper
- black, 2 strips at 2” (ears)
- neon green, 2 strips at 1.5” (eyes)
Caldron
- black, 1 strip at 25” (pot)
- black, 1 strip at 12” (lip of pot)
- black, 2 strips at 3” (feet of pot)
- green/yellow, 4 strips; 5”, 4”, 3”, 2” (poison fumes)

To make the witch’s hat, start with a 10” strip of bright purple and form it into a long triangle, with the tip slightly bent.  Make a circle out of the other 10” strip and squash it flat to form the brim of the hat.  Glue together.

Use the strip of orange and wrap it around the bottom of the hat just above the brim.  It should go across the front and down both sides of the hat (but not around the back).  Trim the strip to fit if necessary. 

To make the buckle use the bit of 1” yellow wide width paper, cut a small rectangle.  Use the black paper to cut an even smaller rectangle, as shown.  Glue the black rectangle onto the yellow one.  Now glue this onto the hat, on top of the strip of orange.  (You can also make a nice hat from other colors, such as black and dark green, and use strips of different colors as well for the sash.)

The cat’s body is made from a wide teardrop formed from the 9” long strip of black paper.  The 5” strip should be formed into an eye shape and glued on top of the teardrop.  Use the 4” length of black to form a tail, curving and trimming into whatever shape pleases you.  Make two ears by making long triangles from the 2” strips of black paper.  An image of the back of the finished cat is shown.

The face is more detailed, and getting a good picture was hard.  First, make two eye shapes from the neon green, and glue them to the upper part of the head, just under the ears.  Now take the 2” strip of black and use the scissors to cut it lengthwise into 4 very narrow strips.  Center these under the cat’s eyes, and fan them out a bit to look like whiskers.  Glue into place one at a time, right on top of one another.  Just use one tiny dab of glue at a time, and then put another whisker down, and glue that.  On top of the center of the whiskers, you will put the nose.  The nose is a triangle made from the 2” strip of narrow black (although regular width would work fine, using narrow width paper here helps to keep the nose from poking out, and hides the middle of the pile of whiskers where you glued them in place.)  Glue the nose.  Trim the whiskers to be the right length for your project.  (mine stick out about ½ to ¼ of an inch from the nose on either side).

The boiling caldron starts with the 25” strip of black, rolled into an offset-circle.  Put the center of the offset at the bottom, and flatten the top of the circle to be the top of the pot.  Use the 12” strip to form a circle, and squash it flat to make up the brim of the pot.  Glue in place.  The feet of the pot are made from the 2, 3” strips made into circles.  Glue to the pot.

The poisonous fumes are made from four pieces of yellow/green paper of various lengths.  Each is made into an “S” Shape and glued to the top of the pot, and to each other wherever they touch.  I used 5”, 4”, 3”, and 2” length strips.

Arrange the hat, cat, and caldron in the lower, middle square.  Glue into place in the middle column, bottom, as shown.

Image Credit:  All my own pictures of my own quilling, all my own original designs.


Halloween Sampler - Projects #6 and #7

Right, I had said in August that I'd get all these sampler instructions up by Halloween.  Well, that's today, and I still have instructions to put up.  So I'm just going to get these two posts up right now, and get this done once and for all :) Still my excuse was all the work I was doing on my "Spiral Moon" project, which as the Moon is also vaguely Halloween-y.

This post covers projects #6 and #7 (out of nine).  I've already posted the general instructions, the mat board cutting instructions, as well as projects #1 - #5 and a bonus project!

First post -  Halloween Sampler
Second post - General Instructions and Mat board
Third post - Bonus Project and Project #1
Fourth post - Projects #2 and #3
Fifth post - Projects #4 and #5 

And remember, if you want to download all the instructions right now in one go, then head over to Craftsy where I have them posted for $3.99.

Project #6: Black Widow Spider

Materials:
Web
- grey, 4 strips at 5” (web top and bottom)
- grey, 1 strip at 3” (web strands)
- grey, 3 strips at ¾” (web)
- grey, 3 strips at 1” (web)
- grey, 1 strip at 2” (strand from spider)
Spider
- black, 1 strip at 4” (head)
- black, 1 strip at 7” (body)
- black, 4 strips at 2” (legs)
- bright red, 2 strips at 2.5” (hourglass)

Web:  The web is made of grey strips.  First, take two 5" strips and make long 'S' shapes.  Glue together to form the ‘side’ of the web.  Make two more long “S” shapes and glue these together for the ‘top’ of the web.  Glue these two sets together where they touch.  Take the 3" long strip and fold it into a 'V' shape.  Place it inside the long “S” shapes and glue into place.  This forms the long, straight structure of the interior of the web. 

The cross webs are each a separate bit of paper, slightly curved.  Inside are three .75" strips, and outside are three 1" strips.  Slide them in-between the “V” and “S” shapes, and carefully glue the ends in place.  I found tweezers to be very helpful when doing this.
 
Then the spider.  The head is a 4" strip of black, and the body is a 7" strip of black, both formed into circles.  Before gluing them together, take 4, 2" strips of black and glue them flat between the head and body, one at a time.  When dry, curve these to form legs, and trim the length as necessary to fit your project. (I wanted my spider legs to be really long, but I had to trim them up to get the spider to fit in the box.)

Take 2, 1.5 inch strips of bright red and form them into triangles.  Glue together at the tip to form an hourglass shape.  When dry, glue this onto the body of the spider. 

Last, take a strip about 2" long of the grey, and attach it to the spider's body.  Attach the other end to the top of the web, trimming as necessary to fit your project.

The black widow can be found in the first box of the project.  Glue the pieces together in the first column, left, top box.

Project #7:  Skeleton Keys

Materials:
Silver Skeleton Key
- silver metallic, 1 strip 20” (skull)
- silver metallic, 10 strips at 1.5” (barrel)
- silver metallic, 2 strips at 2” (long tines)
- silver metallic, 1 strip 1.5” (short tine)
- black, 2 strips at 2” (eyes) 1/16” narrow width
- black, 1 strip at 2.5” (nose) 1/16” narrow width
- black 1 strip at 3” (mouth) 1/16” narrow width
Bronze Skeleton Key
Same as above, except using bronze metallic paper.
Keyholes
- black, 2 strips 4” long
- black, 2 strips 6” long

Start with a 20" strip of metallic silver.  Shape it into a 'pear'.  This is the skull of the skeleton (the top of the key). The barrel of the key is made with 10, 1.5" strips of silver metallic paper.  Form each strip into a tight circle.  (You might need 2" pieces of you don't wind around a needle tool like I do.)  Stack the tight circles and glue them in place in a long line, with all the ends of the strips lining up together (that way you can hide them under the key).  The final three pieces making up the tines of the key are 2 rectangles of 2" paper and one circle of 1.5" paper.  Glue pieces together as shown.

The picture shows the backs of the keys, where I tried to show how the paper ends of all the tight circles all line up along the back of the barrel (but I could have done a better job with my own keys :).  Repeat the whole process with bronze metallic paper for a second key.

The face is made from 2, 2" strips of black in closed circles for eyes, a 2.5" strip in black in a triangle for a nose, and a 3" strip in a long oval or rectangle for a mouth.  These were 1/16" narrow width paper, but you can use 1/8" for the face and it will work fine.  Make two sets of these.  Make sure you are now working with the TOP of your key (lines on the barrel are now down against the work surface) and glue your faces in place.  This picture is a bit over-exposed, but it shows the faces well.

To finish the project, make two keyholes.  Use the black 4” strips to make circles, and the black 6” strips to make long triangles.  Flatten the tops of the triangles slightly.  Glue the circles on the tops of the triangles.

Display your keys and the keyholes together in the sampler.  Glue them into the square in the middle of the left (first) column.

Image Credits:  All my own pix of my own qulling, my original designs

Monday, August 29, 2016

Quilling Supplies: Little Circles

I put in a few orders recently to various suppliers to bump up my quilling inventory (including adding some books to my collection).  My Little Circles order arrived not a moment too soon, as they say!

I realized pretty quickly that I had not ordered enough paper for my quilled Moon, and put an order in for the two colors I was sure to run out of, the colors for the mare (Feathered Fedora) and the highlands (Fish Scales).  I also decided I'd do a bit of a review of Little Circles Paper in the future - like I did with Quilled Creations earlier this month.  So I put an order in for the paper sampler so I could play with it and add that knowledge to my review.  I also just love to have gorgeous rainbow samplers in my supplies.  So pretty.

I was curious about their new line of paper, 'On Edge.'  This is heavier weight paper, like card stock, that is designed to be used for outlining.  Outlining and paper line art has become very popular, especially for outlining letters in typography style pieces.  So I thought I'd give it a shot and see how it worked.  I bought one pack of the white 'On Edge' to play around with.  Plus I bought some tools - these are bamboo 'dowels' of various diameters that can be used in a variety of ways.  I've purchased them to help me make flower petals and such.  Last, there was a nice variety pack of extra paper added to the shipment as a free bonus.  Nice!

Keep your eyes on the blog for my upcoming review of how the Little Circles paper worked out for me.

Image Credit - My picture of my new quilling stuff from Little Circles. 

Monday, August 15, 2016

Halloween Sampler - Projects #4 and #5

I had said last year that I'd get all the instructions for my Halloween Sampler posted by Halloween.  Well, that didn't actually happen - and I just realized that Halloween 2016 is fast approaching!  So at the least, I will get them up by *this* Halloween!

So here is the next installment of the Halloween Sampler Instructions!  This covers projects 4 and 5 (out of nine).  I've already posted the general instructions, the mat board cutting instructions, as well as project #1 and a bonus project!


First post -  Halloween Sampler
Second post - General Instructions and Mat board
Third post - Bonus Project and Project #1
Fourth post - Projects #2 and #3

And remember, if you want to download all the instructions right now in one go, then head over to Craftsy where I have them posted for $3.99.

Project #4:  Lonely Tombstone

Materials:
- grey, 6 strips at 10” long (stone center)
- dark grey, 4 strips at 10” long  (base)
- dark grey, 5 strips at 6” (stone bevel)
- grey, one strip at 30” long (stone top)
- black, 2 strips at 2” long (R and P)
- black, 2 strips at 1.5” long (R and P)
- black, 4 strips at 1.5” long (R and I)

Start by making squares out of all the 10” strips.  Glue the four dark grey squares into a line.  Glue the six grey squares together to form a 2x3 box.  Glue the grey box in the center of the line of dark grey squares, as shown.  (You may notice that all my light grey squares are not quite the same size.  If this happens to you, use the slightly smaller squares higher up on the tombstone, and put the larger ones lower down, glued to the dark grey base.)

Now make squares out of all five of the 6” strips of dark grey, and glue these into a line.  Glue this line on top of the grey box.  Using 30" of light grey paper, create a half circle, and glue this onto the small, dark 
grey squares to form the top of the tombstone.  You might not need the full 30” of paper.  I wanted a very dense top to the tombstone.

The RIP is formed using black strips.  Make a circle out of a 2" strip, and squash it into a line.  Do this with a 1.5" strip as well.  Make a circle out of a 1.5" strip, and slightly flatten it on one side.  Glue these three pieces together as shown to form the “R”.  The “I” is made from three, 1.5" strips, formed into circles and squashed flat.  The “P” is the same as the “R”, without the extra 1.5" piece.  Glue the letters onto the middle of the tombstone.

This forms the central project in the sampler.  Glue it into the center square.

Project #5:  Scary Owl

Materials
- black, 2 strips at 6” long (pupils)
- honey gold, 2 strips at 6” (irises)
- white, 2 strips at 9” (whites of eyes)
- black, 2 strips at 2.5” (outer eye)
- white, 1 strip at 25” (body)
- dark brown, 1 strip at 10” (body)
- dark brown, 1 strip at 4” (forehead)
- dark brown, 2 strips at 6” (eyebrows)
- dark gold, 2 strips at 4” (feet)
- dark brown, 2 strips at 10” (wings)

For the eyes, start by gluing the following in order, end to end:  6" black, 6" honey gold, 9" white, and 2.5" black.  Make two, and create tight rolls with them.  Start rolling from the longer black end (this is the pupil,) and then continue rolling the honey gold (iris) etc.

For the body, take a 25" strand of white and create a circle.  If you like, you can offset the center as I have, or leave it 'natural'.  Surround with 10" of dark brown.  Form into a slight oval shape.  Glue the eyes to the body. 

Now create a dark brown, long triangle to fill in the 'forehead' of the owl.  Use a 4" strip of dark brown.  Use two more dark brown strips 6" in a wavy leaf shape to make 'eyebrows.'   Glue together.

The feet are made of two dark gold strips, 4" long, made into curved teardrops.  The wings are dark brown, 10" long.  You can make these into curved teardrops, as shown here, or semi-circles.  You can keep them close to the body, as I have done, or angle them outwards so the owl appears to be flying.  Glue as shown.

Finally, use a 4" strip of honey gold in the form of a diamond to make the beak. Glue the beak on top of the 'face' just a bit between and below the eyes, as shown.

In the sampler, the owl is in the center of the top row.  Glue the owl into this square.

Image Credit:  All my own pix of my own quilling, my original designs.


Saturday, March 12, 2016

Herb Sampler, Selling Your Work, and More

Lovage - My favorite herb in the kit so far!
So as I mentioned in my first Herb Sampler post, I've finally gotten down to doing serious work on this project I've been meaning to get done for more than two decades.  It's a pretty good kit, this Herb Sampler, similar to the Berry Sampler in many ways.  But there are a few differences that make the Berry Sampler superior, I think. 

First of all, the berries are more three dimensional.  The leaves and such in the berry kit are more tilted, giving the whole piece more of a living feeling.  And the second issue is that this is the first time I have run out of green paper in a kit!  I'm very surprised.  I've never had this happen before, and certainly not with the old Quill Art kits.  Fortunately I had one of those old kits around to raid, and found enough similar paper to continue.  It isn't perfect.  The color is just a smidge off, and the width isn't quite as narrow by half a millimeter, but given one thing and another, I think it will suffice.  I'm pretty picky.  I think all quillers are detail oriented by nature, so good enough is probably, well, good enough.

Kit is coming along - just three more to go - assuming
I now have enough paper ...
I was about half way through the herb kit when a friend visited and saw my completed berry sampler up on the wall in the kitchen.  She liked it, but it was when I showed her my still-in-progress herb sampler that her eyes really lit up.  She asked me to make her one, and said she'd pay for it.  I was (an am) a bit baffled as how to handle it.  I'm more than happy to make her one, although it may be a while before I manage to get through another entire sampler after 23 years of waiting :)  But more, it is the idea of selling this kind of work.  It is impossible to actually get the work value out of quilling, assuming you pay yourself an hourly rate that reflects your expertise at the craft.  Even say $20 an hour, which seems very low for such work, means I'd be charging hundreds of dollars for this piece.  I'm not going to ask a friend to pay that.  So what is the answer?  Ask for less?  Ask for nothing and give it away?  That last is certainly how I've dealt with this issue in the past.  It has always seemed strange to get paid for quilling.  How do you deal with this issue?

Form with filled quills for petals.
So I've placed a picture of the "Lovage" herb front and center on this post.  The Lovage is my favorite so far.  I really love the way the flowers look, with the graceful curls all the same size.  I did not use a mold or form to make these.  I simply eyeball the size, and get very consistent results.  I rarely use the forms and molds, since I find them sort of distracting.  Still, I did use them recently to create my "Pantone" flower, ensuring all the petals would have the same size, in spite of the different weights of the paper.  How about you, do you use forms, and when?

Image Credits:  My pictures of my own stuff, and my own work.  Herb Sampler kit is 1993 Malinda Johnston.

Sunday, January 24, 2016

Herb Sampler after Twenty Three Years

First pattern of twelve - Lemon Balm
As the title notes, I've had my kit for Malinda Johnston's "Herb Sampler" since the darn thing came out - 1993 I think.  Since that time I've fully intended to start (and then complete) the kit.  I've already done the Berry Sampler (completed in 1994).  I want to get the Herb Sampler framed in the same way, and hang them together in the kitchen.  Right now the Berry Sampler is quite lonely in there (and has been for twenty two years ...)

So this is the current '"Work in Progress" WIP as far as quilling goes.  I cracked open the kit and started work.  First of all it is interesting to feel the difference in papers between now and then.  Modern papers, at least in my experience, have a pretty consistent feel regardless of color.  But back then, papers seemed to vary pretty widely in texture depending on the color.  I don't know if that was an actual difference in the paper itself used for each color, or if the dye process changed the texture.  But it is pretty obvious when you run your fingertips over the strands of paper.

My framed Berry Sampler
The second thing ... It's been a long while since I've worked exclusively with very narrow width paper.  This stuff is a shade more narrow than 1/16".  Quite narrow.  And my fingers and hands are rather a bit more stiff than they used to be.  I used to love narrow paper for the lightweight, lacy effect.  I worked with it as much as standard 1/8" paper when I was a kid.  Well the years have made quite a difference, there.

Lastly, I'll mention it's fun to work from a kit again.  My last project was of my own design, and so each and every piece was unique, won't be repeated.  All my color and paper length decisions were made as I went along, along with part of the design.  It made the quilling very slow going, trying experiments (that often didn't work the first time through) and new techniques.  It was fun, yes, but sometimes frustrating.  A kit might be boring for some, given you just follow the lines, but it is a welcome break from the detailed process of design.  At least for the moment. 

I'll post some more updates as I go!

Image Credit - My pic of my own work, pattern Melinda Johnston 1993.


Thursday, September 24, 2015

Halloween Sampler - Projects #2 and #3

Here is the next installment of the Halloween Sampler Instructions!  This covers projects 2 and 3 (out of nine).  I've already posted the general instructions, the mat board cutting instructions, as well as project #1 and a bonus project!

First post -  Halloween Sampler
Second post - General Instructions and Mat board
Third post - Bonus Project and Project #1

And remember, if you want to download all the instructions right now in one go, then head over to Craftsy where I have them posted for $3.99.

Project #2: Frightening Ghost

Materials:
- light grey, 9 strips at 6” long (body)
- light grey, 2 strips at 4” long (body)
- light grey, 1 strip at 10” long (head)
- light grey, 2 strips at 8” long (arms)
- black, 2 strips at 2” long (eyes) – 1/16” narrow strip
- black, 1 strip at 4” long (mouth) – 1/16” narrow strip
- grey, 4 strips at 6” long (fog)

Take the nine strips of light grey 6” long and make long diamond shapes. Take the two strips of light grey at 4” long and make two teardrops. Also make teardrops out of the two 8” long light grey strips, curving the teardrops slightly at the ends. Make another teardrop from the 10” long light grey strip. Glue these together as shown to form the ghost.

For the face, create three circles from the narrow black strips, and use the larger circle for the mouth. Glue these onto the ghost.

For the ‘fog’ use 4 strips of a slightly darker color of grey. Make very long “S” coils from each of these. Glue two of the “S” shapes together as shown for the lower border, and two other “S” shapes together for the side border. Glue these together where they touch.

The ‘fog’ is of course optional. If you are choosing to put your projects into the sampler, then you may want the fog to help ‘frame’ the projects. Each of the four projects in the corners of the mat board have an element that helps to frame them.

Glue these pieces into the mat board, right column bottom square.

Project #3: Jack-O-Lantern

Materials:
Jack-o-Lantern
- orange, 1 strip at 14” (large pumpkin)
- orange, 2 strips at 16” (large pumpkin)
- orange, 2 strips at 18” (large pumpkin)
- light brown, 1 strip at 4” (large stem)
- olive green, 1 strip at 3” (leaf)
- olive green, 1 strip at 2” (corkscrew vine)
- black, 2 strips at 4” long (eyes)
- black, 1 strip at 3” long (nose)
- black, 3 strips at 2.5” long (mouth)
Border
- olive green, 2 strips 3” (leaves)
- olive green, 2 strips at 4” (leaves)
- olive green, 2 strips at 4” (vines)
- light brown, 1 strip at 2” (small stem)
- olive green, 1 strip at 1” (corkscrew vine)
- orange, 1 strip at 4” (small pumpkin)

The pumpkin is made of bright orange, five strips, one at 14", two at 16", and two at 18". Take the 14” strip and make an ‘eye’ shape. Take the other long orange strips and make crescent shapes. Glue the shorter crescents to the eye shape, and then glue the longer crescents to form the outside of the pumpkin, as shown.

The stem is light brown at 4" long, formed into an asymmetrical square shape. Make the leaf shape from the olive green 3" strip. Use a toothpick or quilling tool to help form the corkscrew vine from the 2" of olive green. The face is made of black strips, all triangles, with eyes of 4" long, nose 3", and three teeth at 2.5" each. Glue together as shown.

The vines are long “S” shapes, each 4" of olive green. Make all four leaves, and glue the smaller 3” leaves closer to the middle of the vines. Glue the longer 4” leaves to the ends of the vines.

The small pumpkin is a somewhat flattened circle made from one 4" bright orange, strip. It has a tiny square stem made from the 2" light brown strip, and a coil of 1" olive green.

As you see from the photo, the ‘vines’ and the small pumpkin are not attached, but are separately glued to the white background. The jack-o-lantern is framed nicely by the vines. Glue these pieces into the left column, into the square at the bottom left corner.

Thursday, September 17, 2015

Halloween Sampler - First Projects

As promised, I'm going to post the instructions for my Quilled Halloween Sampler here on the blog.  This is the third post; time to get into the projects!

First post -  Halloween Sampler
Second post - General Instructions and Mat board

And remember, if you want to download all the instructions right now in one go, then head over to Craftsy where I have them posted for $3.99.


BONUS Project:  Quilled Candy in Wrappers

Materials:
- white, 6 strips at 4” long (wrapper)
- white, 3 strips at 8” long (candy)
- bright yellow, 1 strip at 8” long (candy)
- light red, 1 strip at 8” long (candy)
- purple, 1 strip at 8” long (candy)
- orange, 1 strip at 8” long (candy)
- black, 1 strip at 8” long (candy)


Here is an easy project to start off that’s not shown in the sampler – quilled candy in ‘wrappers.’  Start by stacking (right on top of each other, NOT end to end) the red, yellow, and white strips all at once.  The white strip should be on the ‘bottom.”  Roll the three strips up all at the same time.  The three colors swirl together as you roll them.  Make sure the white ends up on the ‘outside.’  Form a circle (the colored strips might need to be trimmed to hide them under the white.) 

Make two triangles with 4" of white paper each.  Curve one side.  Glue these with the curved side out, to either end of the circle.  Repeat with a stack of green/purple/white, and then a stack of orange/black/white.

Project #1:  Flying Bat

Materials:
- black, 8 strips at 6” long (wings)
- black, 1 strip at 9” long (body)
- black, 2 strips at 2” long (ears)
- black, 3 strips – from ¾” long to 1.5” long (small bats)
- bright yellow, 1 strip at 10” long (moon)

First make eight circles with the 6" black strips.  Form these into triangles, but curve one side of each.  Glue these together as shown to form two wings. (Each wing has three triangles pointed ‘up’ and one pointed ‘down’.) 

For the body, take a 9" black strip and make a teardrop.  Take 2" black strips and form them into long triangles for the ears of the bat.  Glue the pieces together. 
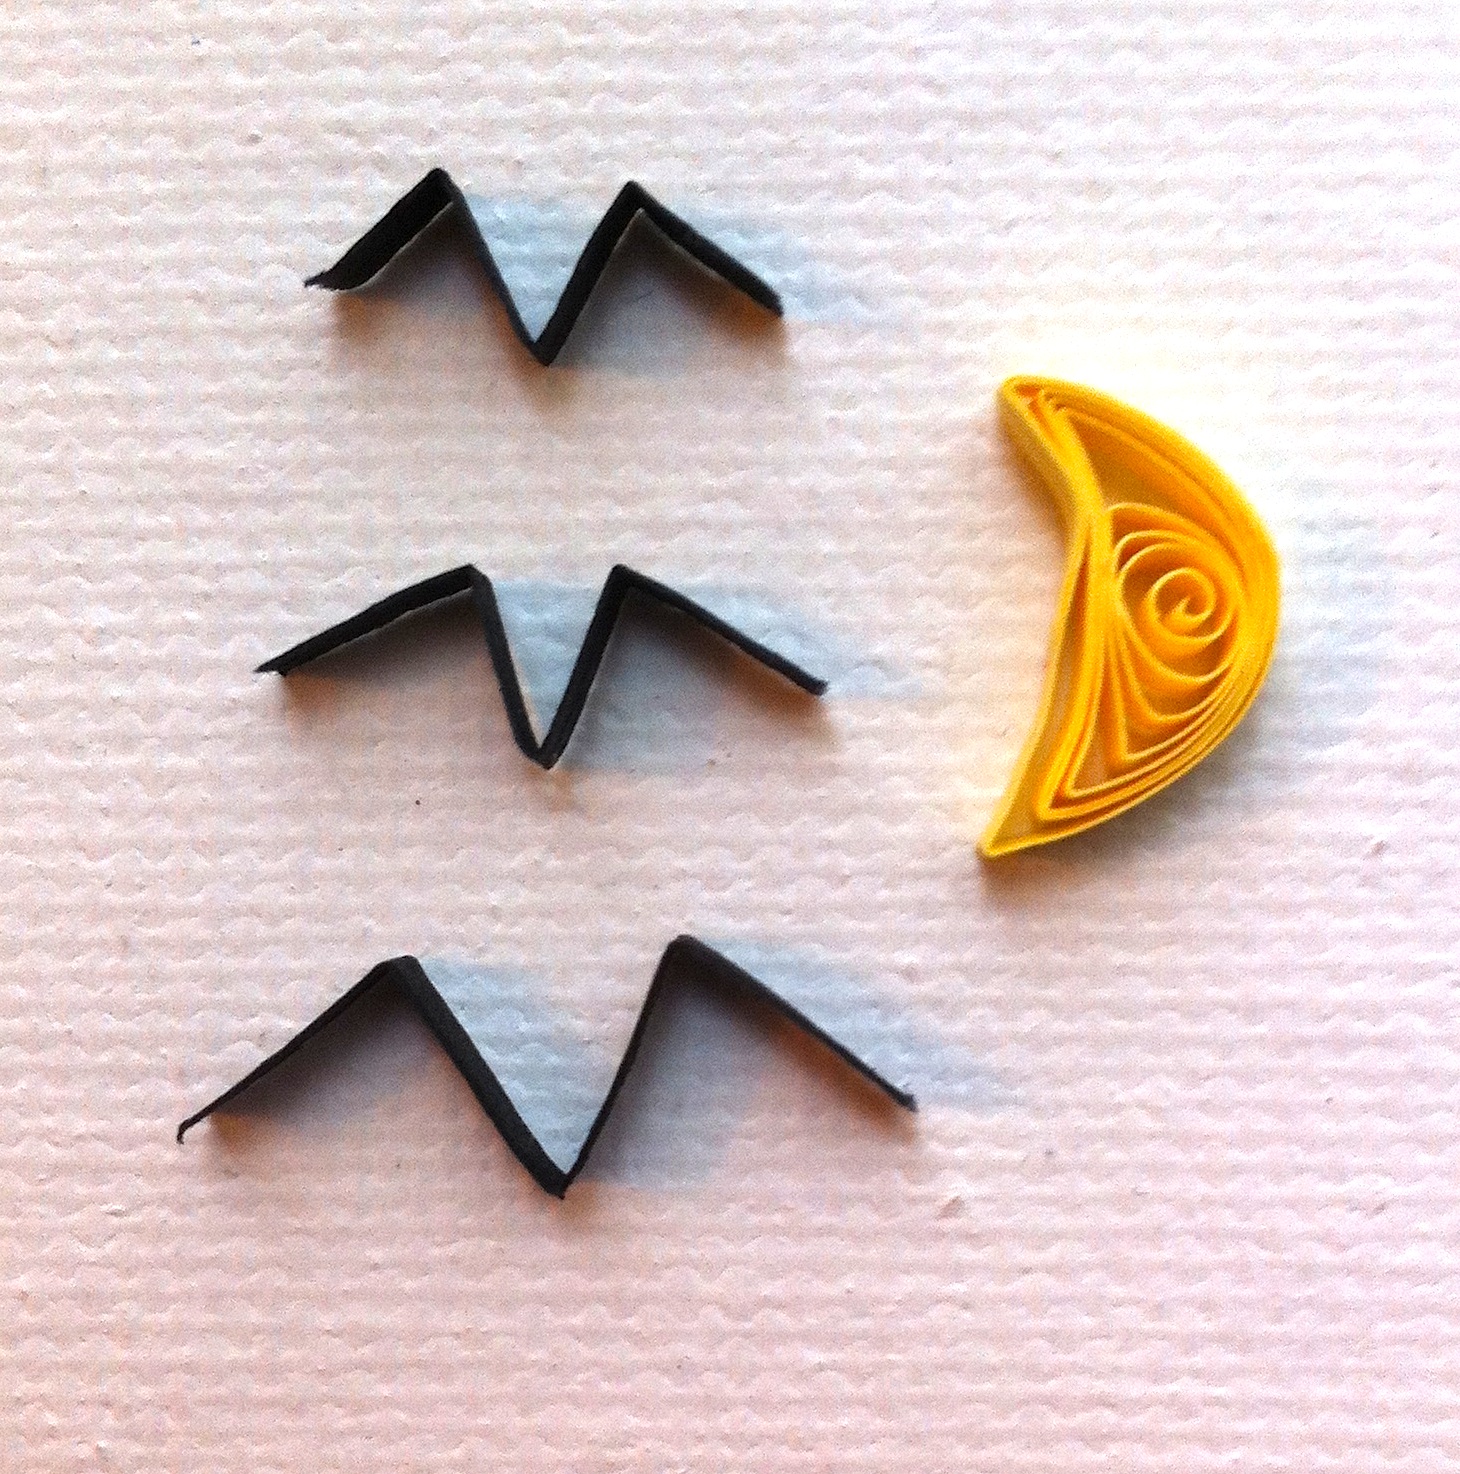
Take three black strips that are from 3/4" to 1.5" and make "M" shapes (other bats).  Use a 10" strip of bright yellow in the form of a crescent to serve as the Moon.

Glue these pieces into the mat board – right side middle square.

Image Credit - My pix of my quilling, my designs

Tuesday, September 15, 2015

Quilled Halloween Sampler - Starting the Directions

Empty mat board ready for quilling!
As promised in my first post on my Halloween Sampler, I'm going to post the instructions for the Sampler here on the blog.  It's a lot of material, so it will take several posts to get it all up.  No time like the present!

And remember, if you want to download all the instructions right now in one go, then head over to Craftsy where I have them posted for $3.99.

Here's where it starts … General Instructions

The rest of the projects in the Sampler assume you have read and followed all of these instructions.

Difficulty: 
Overall, the level of this tutorial is “Beginner” with some elements that are “Intermediate.”  If you are a “Novice” (that is, if you have no experience with quilling) you will first need to find a book or online tutorial that shows you how to quill, and how to make all the standard shapes, such as roses, coils, off-center quills, and more.  Practice making these shapes and doing some basic projects to learn about how to use the materials, etc.  Then you can proceed to use these instructions.  These projects are listed in order of increasing difficulty.

Photos:
Photographs are not to scale!  They are only for reference!  Some are close-ups and some are zoomed out!  They do not show the exact size of the intermediate or finished projects.  So do not print them out and quill over them!  Make the shapes as directed in the instructions, and glue them together in the ways shown in the pictures.  You can get an idea of the size by looking at the front cover (the image from the last post of the whole sampler).  Each of the boxes, including the black outline, is 3x3 inches tall and wide.  The black lining takes up ¼” on each side of the box, and the top and bottom.  So the white space inside each box is 2.5”x2.5” on each side.

Materials: 
This tutorial assumes you have access to a variety of colored quilling papers, (but feel free to make substitutions for color as you like when you go along).  When not stated, the width of the paper is the standard 1/8 of an inch.  Other papers used are 1/4 inch wide paper and 1/16” (inch) wide paper.  You will need scissors and white craft glue.  Tweezers and a quilling craft board with pins would be very helpful.  If you wish to make the mat-board for the whole sampler, you will need the materials listed in that section.

Length of Strips:
Remember as you are working through this project, and all the other projects, that the length of strips listed may not work perfectly for you.  Some people roll quills tighter or looser than others, and so need a bit more or less paper to get the same size in the final piece.  Also, some paper is thicker than other paper.  Be prepared to experiment to get the results you want.  Use the lengths of paper suggested as a guide that you can detour from whenever necessary.

Make and Use What You Like:
Some of the projects have additional pieces you can make, like the ghost has a swirled ‘fog,’ the vampire fangs have a thorny rose, and the pumpkins have coiled vines around them.  You can choose to make all the pieces and frame your sampler together, or just make the pieces you like and use them on cards, gifts, and whatnot!

Displaying Your Projects - Creating a Mat Board

Materials:
- One piece 12”x12” cardstock, medium grey (top)
- One piece 12”x12” cardstock, white (bottom)
- Black quilling strips, 1/4" wide

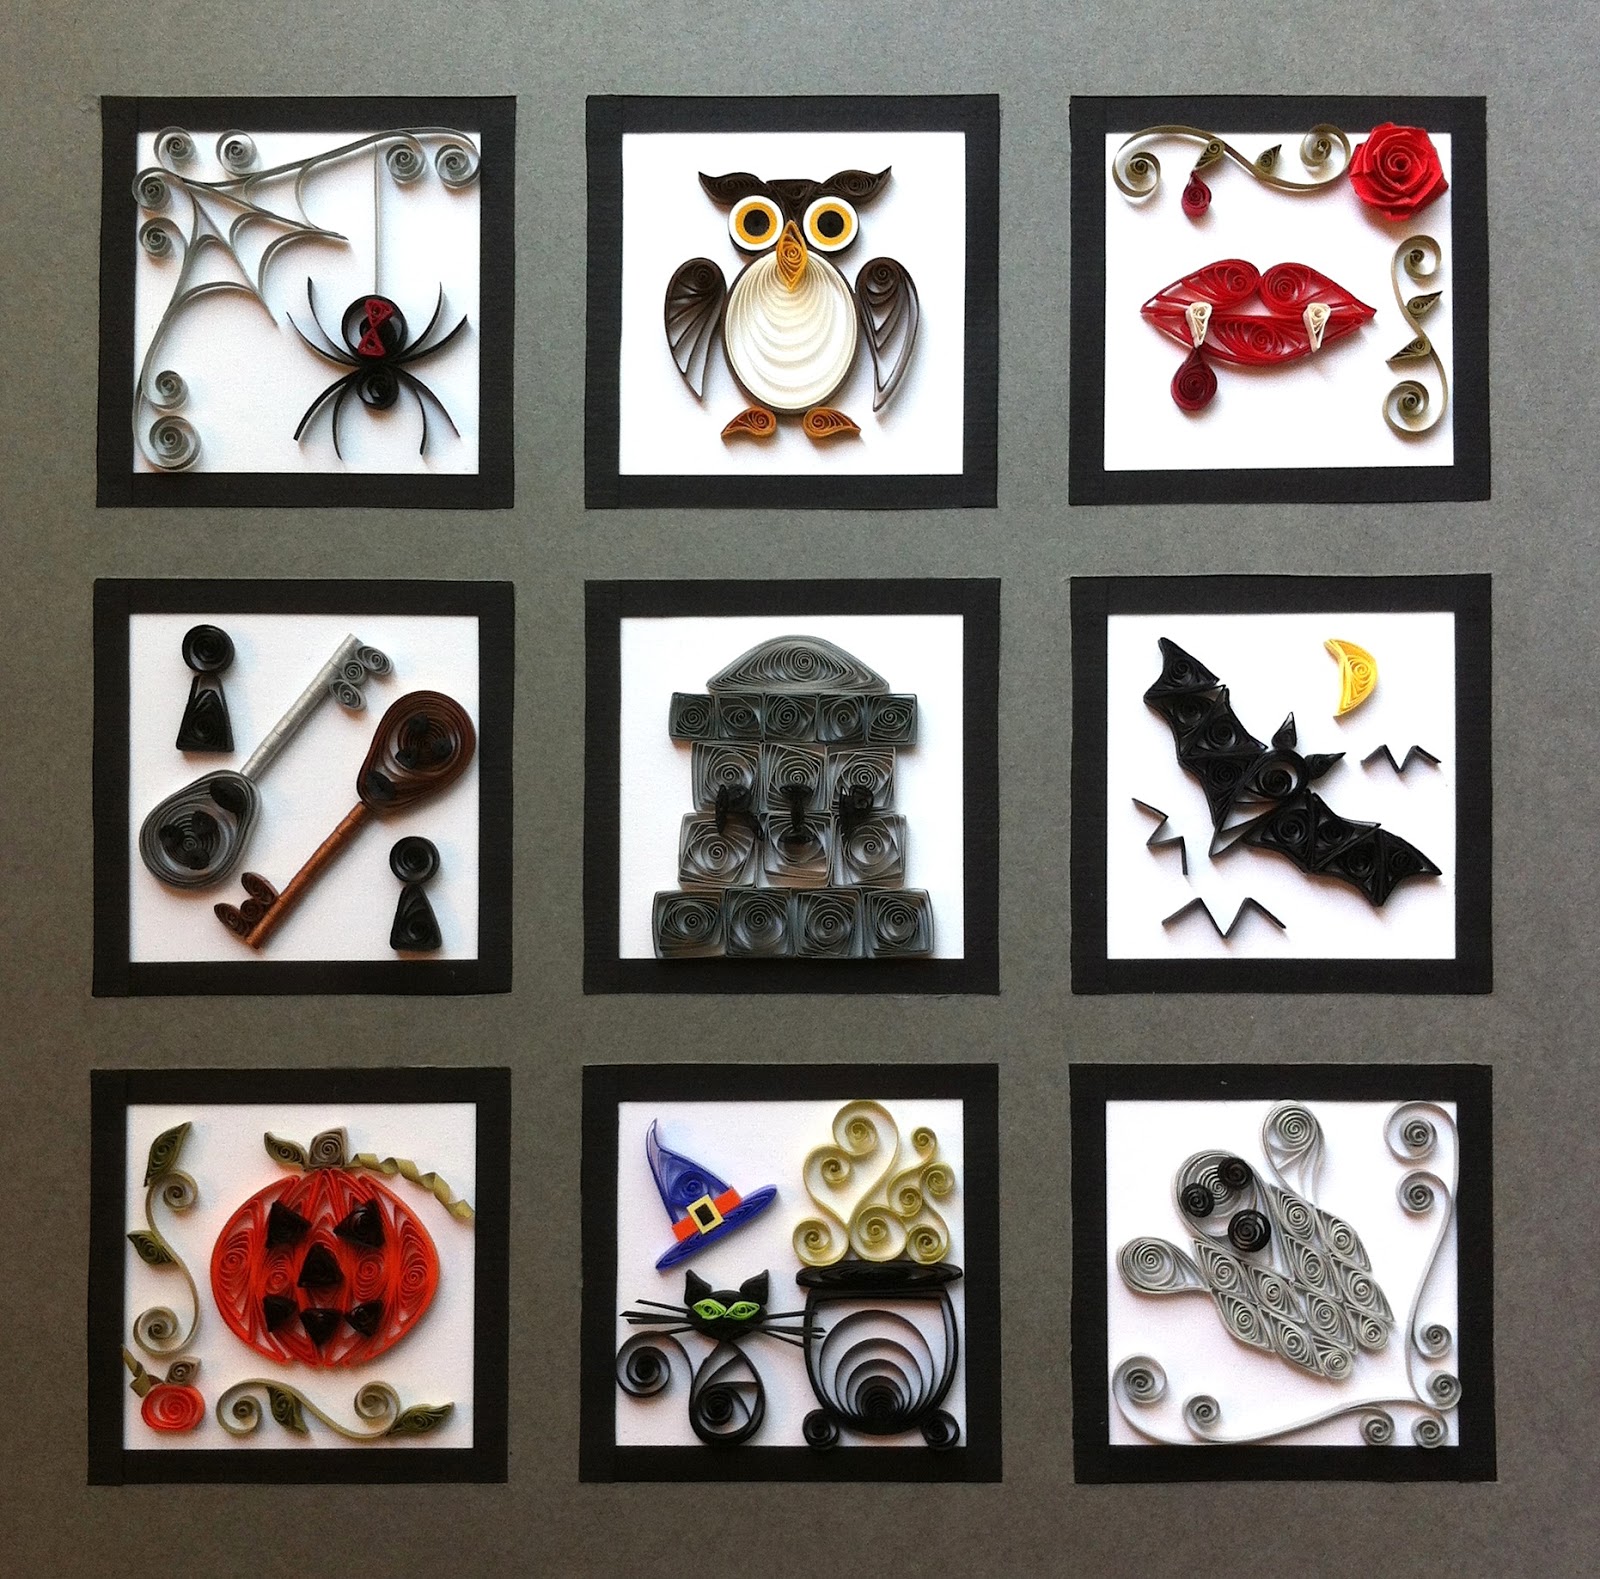
As I mentioned, you can use these designs and motifs in a variety of ways. I decided to put all of mine into small 3x3 inch 'vignettes' and show them off together as a “sampler”. To do this, I purchased two pieces of good 12x12 inch cardstock, one in a medium grey (top layer) and the other in white (bottom layer).

I cut 3x3 inch holes in the grey cardstock, measuring a one-inch margin all around the outside, and a half-inch between each of the 'windows.' I glued the cardstock pieces together, and then lined the inside of each of the 3x3 inch windows with 1/4" width strips of black quilling paper so it would look like a double mat.

If you like, you can frame your project when it is complete. I suggest a shadowbox frame with at least ¾” of clearance between the background and the glass. The rose sticks out about that far, and you don’t want to squash it or any of the other elements that have relief.

I found a standard 12”x12” black shadowbox frame with an inch of depth inside, and used that.


Image Credit:  My pix of my mat boards, my design.

Thursday, September 10, 2015

Quilled Halloween Sampler

I've been considering making a sampler of quilled Halloween projects for a long time.  I love Halloween, and often use small designs and motifs on place cards, tags, ornaments, wall art, and more.  I've never bothered to actually write down any of my designs before - so they come out differently every year, AND I have to spend extra time and paper trying to figure out what I did the last time around :)

So this year I spent the time and effort to record all my paper widths, lengths, and shapes as I worked.  I also took a few pictures of the intermediate stages as I went along.  I realized when I was close to finished that I might not be the only person who would like to use the directions.  So to make up some of the resources I used, and to cover some of the time (it took a loooong time to write this up), I decided to post all the instructions for a fee over at Craftsy.  So if you are in immediate need of some ideas for Halloween, look no further!  You can download all 16 pages of Halloween packed PDF for $3.99.

OR if you can wait, and don't have the extra $$, then keep your eyes here on the blog.  I'm going to post all the instructions in pieces right here between now and Halloween!

Here's the blurb from over at Craftsy:

The Quilled Halloween Sampler Instructions will tell you how to make nine different small Halloween themed projects (plus a bonus project!). The 16 pages are packed with pictures and ample details of paper quilling for you to recreate the sampler, or use it to come up with your own scary ideas!

These spooky designs can be used together to form a framed Halloween sampler group, or they can be used separately on greeting cards, gift tags, place settings, ornaments, wall art, or in whatever way suits your fancy! You can be creative and detour from the exact directions whenever it suits you and your project needs.

Some of the projects are very quick, while others are a little more involved, so you can fit the projects to the time you have available. Most of the designs are suitable for someone who knows the basics of paper quilling (beginner), while a few others are suitable for an intermediate level of quiller.

Most of the designs and motifs will be familiar, like bats and pumpkins, while others will be more unusual, like vampire fangs and skeleton keys. Let your creepy side out and enjoy some Halloween fun with the Quilled Halloween Sampler!